
NC State Extension

Really Rad Rain Gauge

en Español / em Português
Español

El inglés es el idioma de control de esta página. En la medida en que haya algún conflicto entre la traducción al inglés y la traducción, el inglés prevalece.

Al hacer clic en el enlace de traducción se activa un servicio de traducción gratuito para convertir la página al español. Al igual que con cualquier traducción por Internet, la conversión no es sensible al contexto y puede que no traduzca el texto en su significado original. NC State Extension no garantiza la exactitud del texto traducido. Por favor, tenga en cuenta que algunas aplicaciones y/o servicios pueden no funcionar como se espera cuando se traducen.


Português

Inglês é o idioma de controle desta página. Na medida que haja algum conflito entre o texto original em Inglês e a tradução, o Inglês prevalece.

Ao clicar no link de tradução, um serviço gratuito de tradução será ativado para converter a página para o Português. Como em qualquer tradução pela internet, a conversão não é sensivel ao contexto e pode não ocorrer a tradução para o significado orginal. O serviço de Extensão da Carolina do Norte (NC State Extension) não garante a exatidão do texto traduzido. Por favor, observe que algumas funções ou serviços podem não funcionar como esperado após a tradução.


English

English is the controlling language of this page. To the extent there is any conflict between the English text and the translation, English controls.

Clicking on the translation link activates a free translation service to convert the page to Spanish. As with any Internet translation, the conversion is not context-sensitive and may not translate the text to its original meaning. NC State Extension does not guarantee the accuracy of the translated text. Please note that some applications and/or services may not function as expected when translated.

Collapse ▲

Work alongside Daniel to make a rad rain gauge for your garden!

Supplies:

Time needed: 20 minutes
  • Plastic Bottle
  • Scissors
  • Ruler
  • Marker
  • Duct Tape

Let’s Do It!

  1. Take your plastic bottle and, using the scissors, carefully cut off the top of the bottle about where the bottle starts to narrow. This can be tricky (and sharp!) so have an adult nearby to help you.
  2. Place the cut-off bottle top upside down in the bottom half of the bottle to make a funnel. If you need to, use some tape to secure the funnel. This funnel helps to prevent evaporation of the rain water before you get a chance to take measurements.
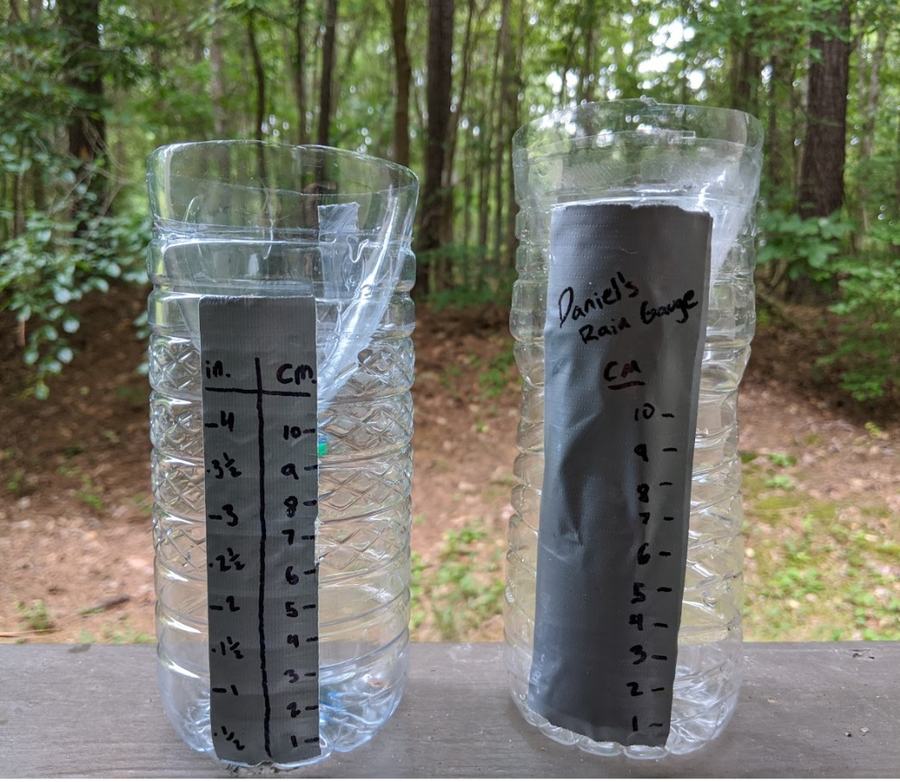
  3. Place your ruler next to the bottle and, using a pen, mark and label every centimeter (cm) up the side of the bottle. You can also measure in inches (in) and mark quarter or half inches. If you’re having trouble getting your marker to write on the plastic, place a strip of duct tape on the bottle and write on that!
  4. Your rain gauge is done! Find an open spot outside for it to collect rain. Make sure the bottle is secured so wind doesn’t blow it away. You can bury the bottom half underground, wedge the bottle between two objects, or dump a handful of small pebbles into the bottom to anchor it down.
  5. Wait until it rains and then make some observations with your brand new rain gauge!
Download the activity PDF

Talk it Over!

  1. How could you use a rain gauge in your garden?
  2. Is the bottom of your bottle flat or filled with pebbles? How might this affect your measurements when collecting rain? How could you change your rain gauge to get more accurate measurements?
  3. Time how long a rain storm lasts and compare that to the amount of rain in your gauge. Record your observations and repeat over the next few rain storms. Did it rain a whole bunch in a short period of time? Did it rain all day but your gauge still didn’t fill up that much?
two Rain Gauges

Finished Rain Gauges